
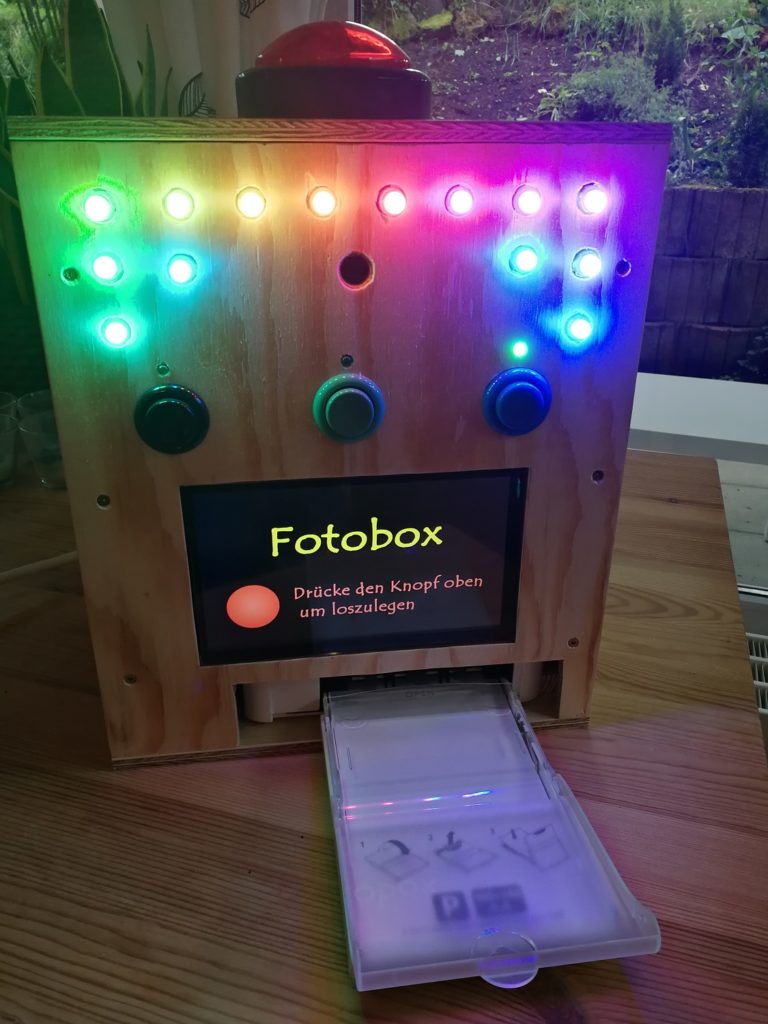
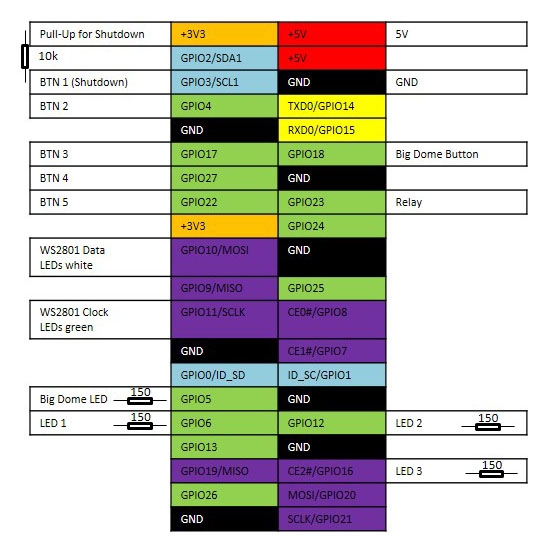
My latest project is a photobooth which is operated by a Raspberry Pi Zero and the Raspberry Pi Camera Module.
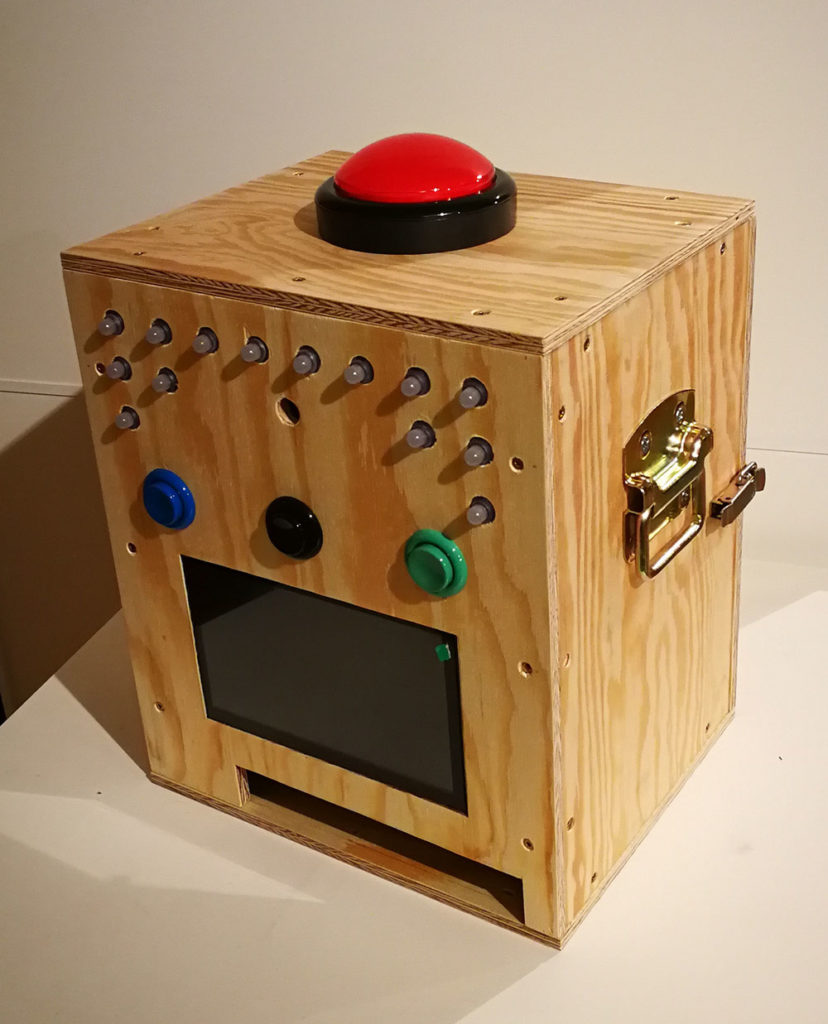
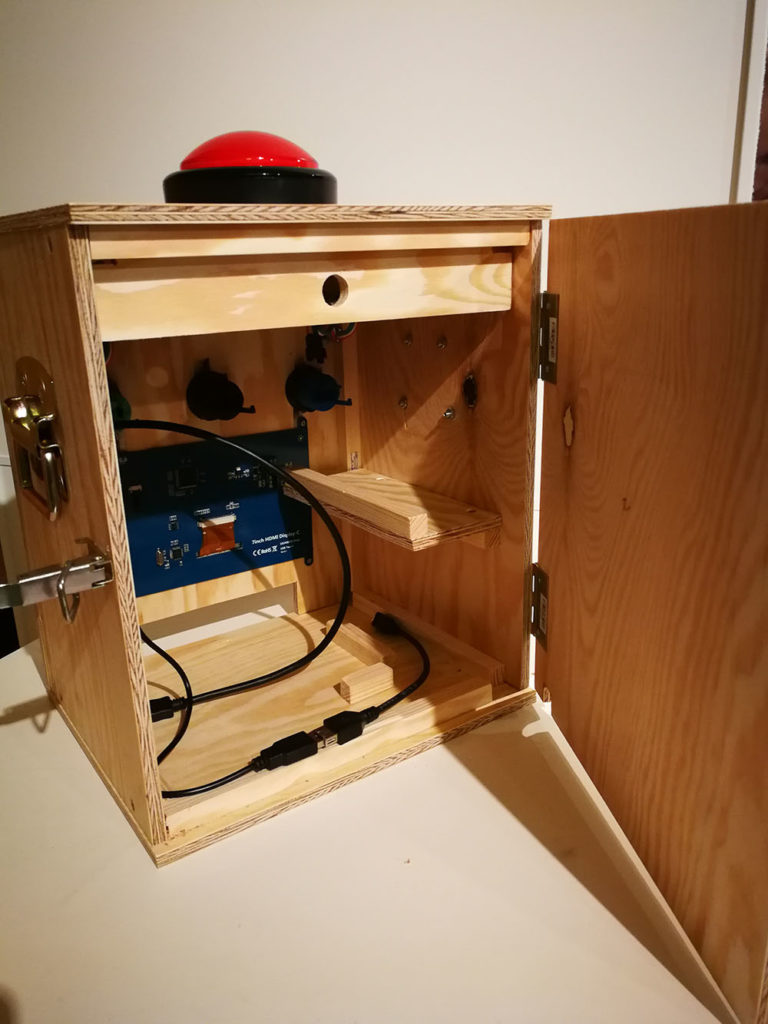
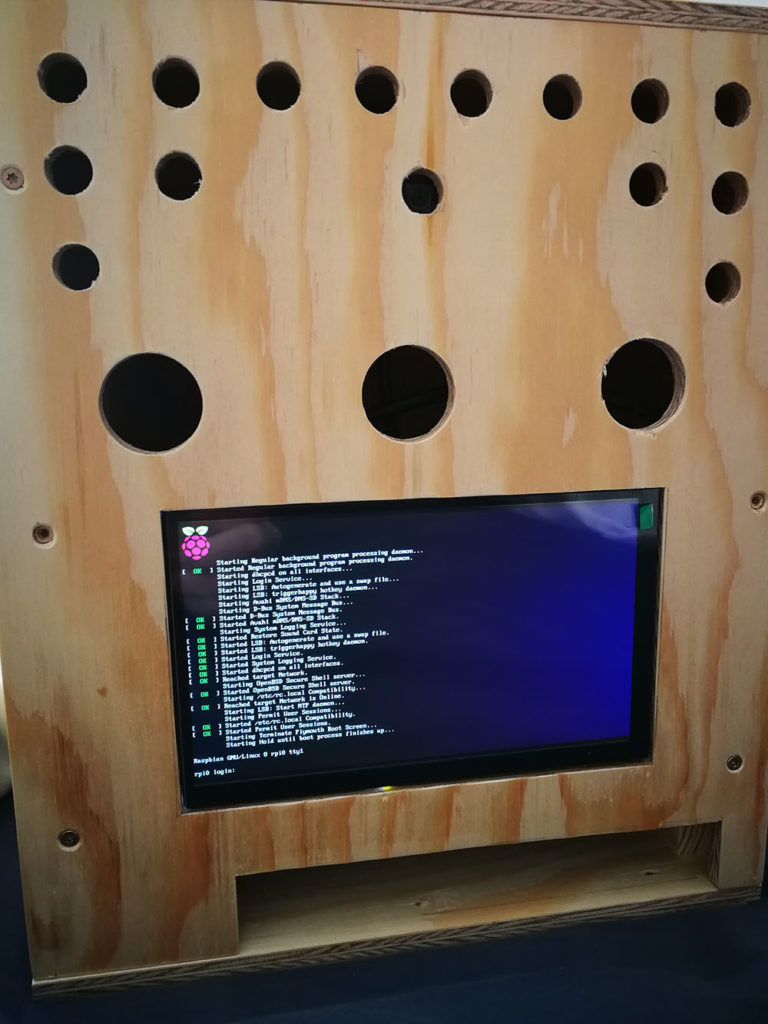
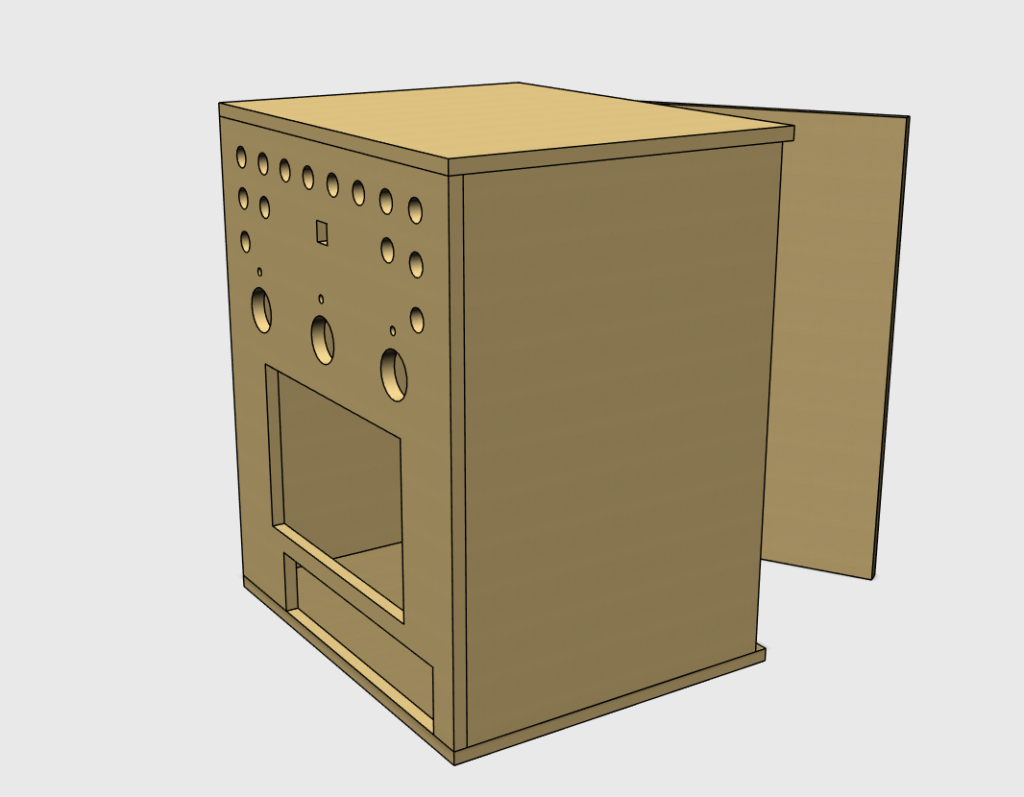
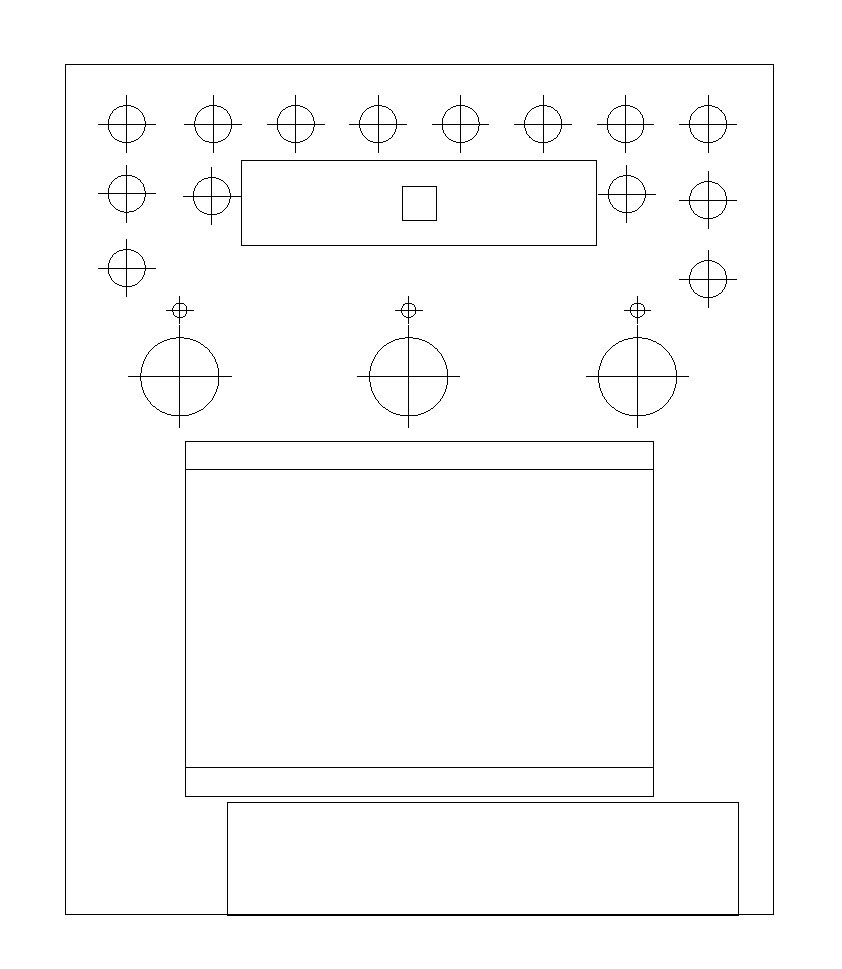
The photobooth is in a wooden case with a photo printer, a HDMI display, some buttons and WS2801 LEDs which are used as flash.
You can find the code for the photobooth on github.
Instructions
Materials
The used materials are:
- Raspberry Pi (e.g. Zero)
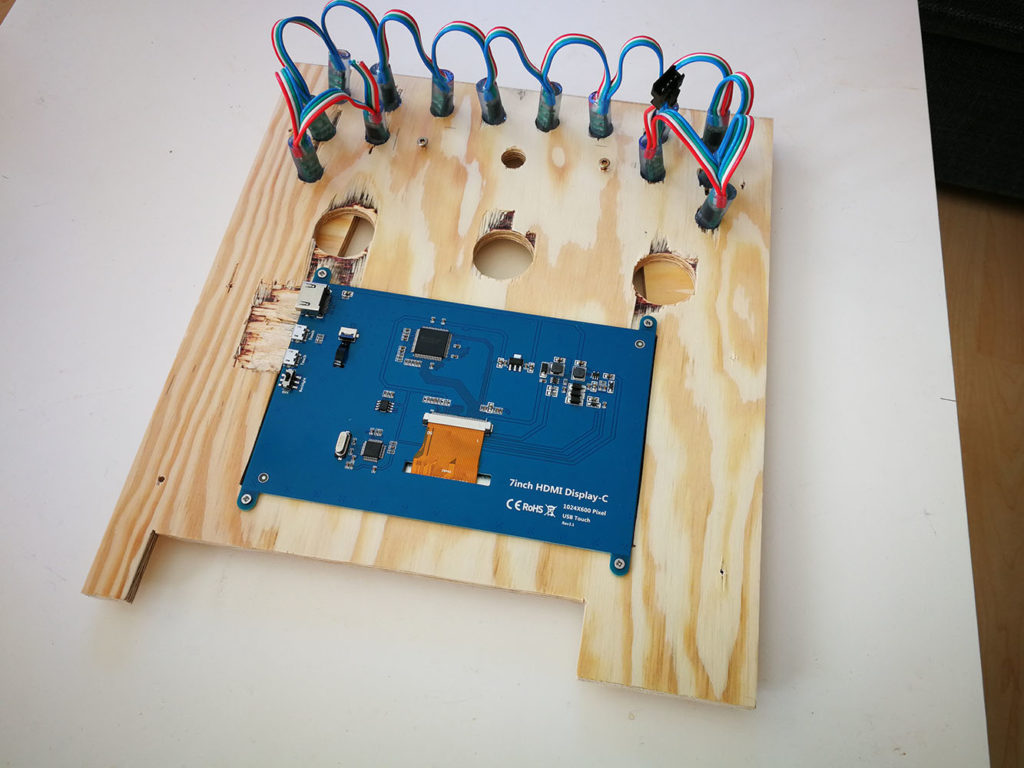
- Raspberry Pi Camera module
- HDMI screen
- Canon Selphy photo printer
- Big huge red button
- 3 Aracade buttons
- 3 green LEDs
- 14 WS2801 LEDs strip
- 5V relay to trigger the power of the printer
- wooden case
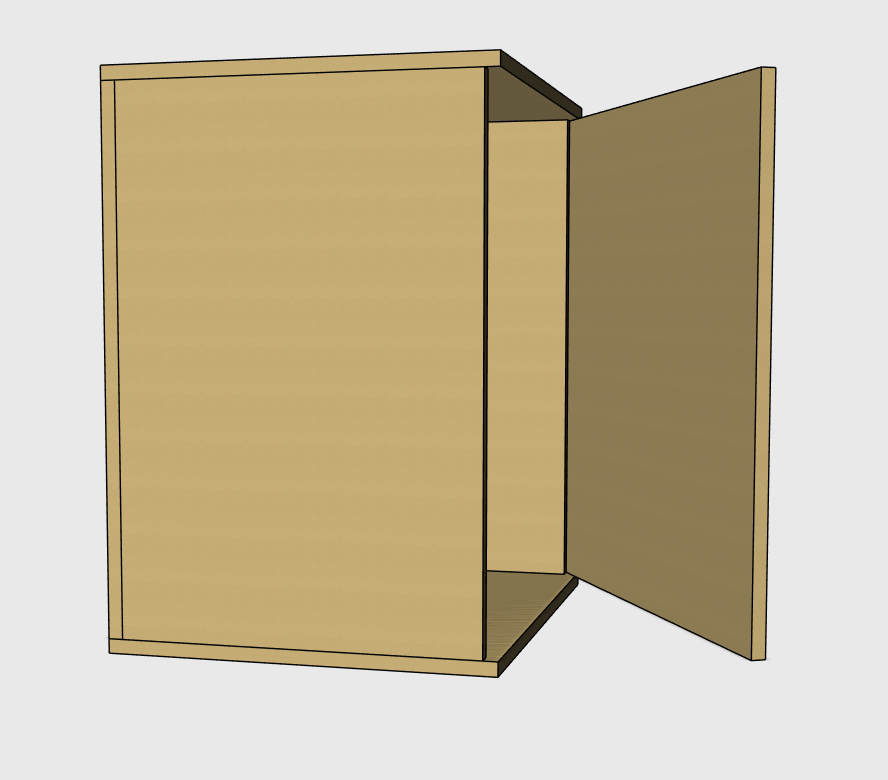
Case
For the case the following 8mm wood plates are used:
- 2x 266x300mm (front and back)
- 2x 266x166mm (top and bottom)
- 2x 200x300mm (left and right)
Display
Add the following to your config.txt (see https://www.waveshare.com/wiki/7inch_HDMI_LCD_%28C%29#Working_with_Raspberry_Pi)
max_usb_current=1
hdmi_group=2
hdmi_mode=87
hdmi_cvt 1024 600 60 6 0 0 0
hdmi_drive=1
Camera
Activate picamera in raspi-config: sudo raspi-config
WS2801 LEDs
- Enable SPI in raspi-config:
sudo raspi-config - Install the Adafruit_Python_WS2801 python module (https://github.com/adafruit/Adafruit_Python_WS2801#installation)
Printer Installation
- Install cups
- Add Canon Selphy printer to cups (https://localhost:631)
Functionality
All the neccessary parameters are configured in config.py.
When starting the python script the intro screen is visible. You can select whether you want to make a single or a multi shot with the corresponding arcade buttons.
With a press on the big red button an picture is captured. After the capturing process the images are combined with an optional label image.
Afterwards you see a preview of the picture which can be printed with the corresponding arcade button.
When pressing the big red button you can capture the next picture.
Credits
This photobooth is inspired by https://github.com/jibbius/raspberry_pi_photo_booth, https://github.com/safay/RPi_photobooth, https://github.com/drumminhands/drumminhands_photobooth, https://github.com/zoroloco/boothy