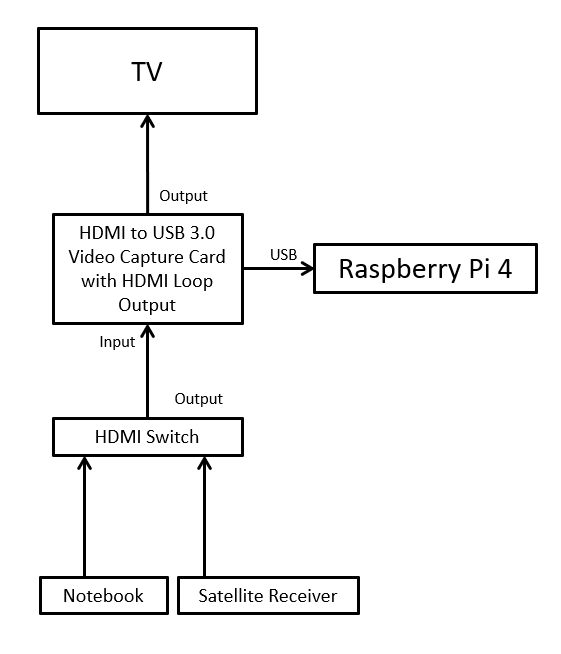
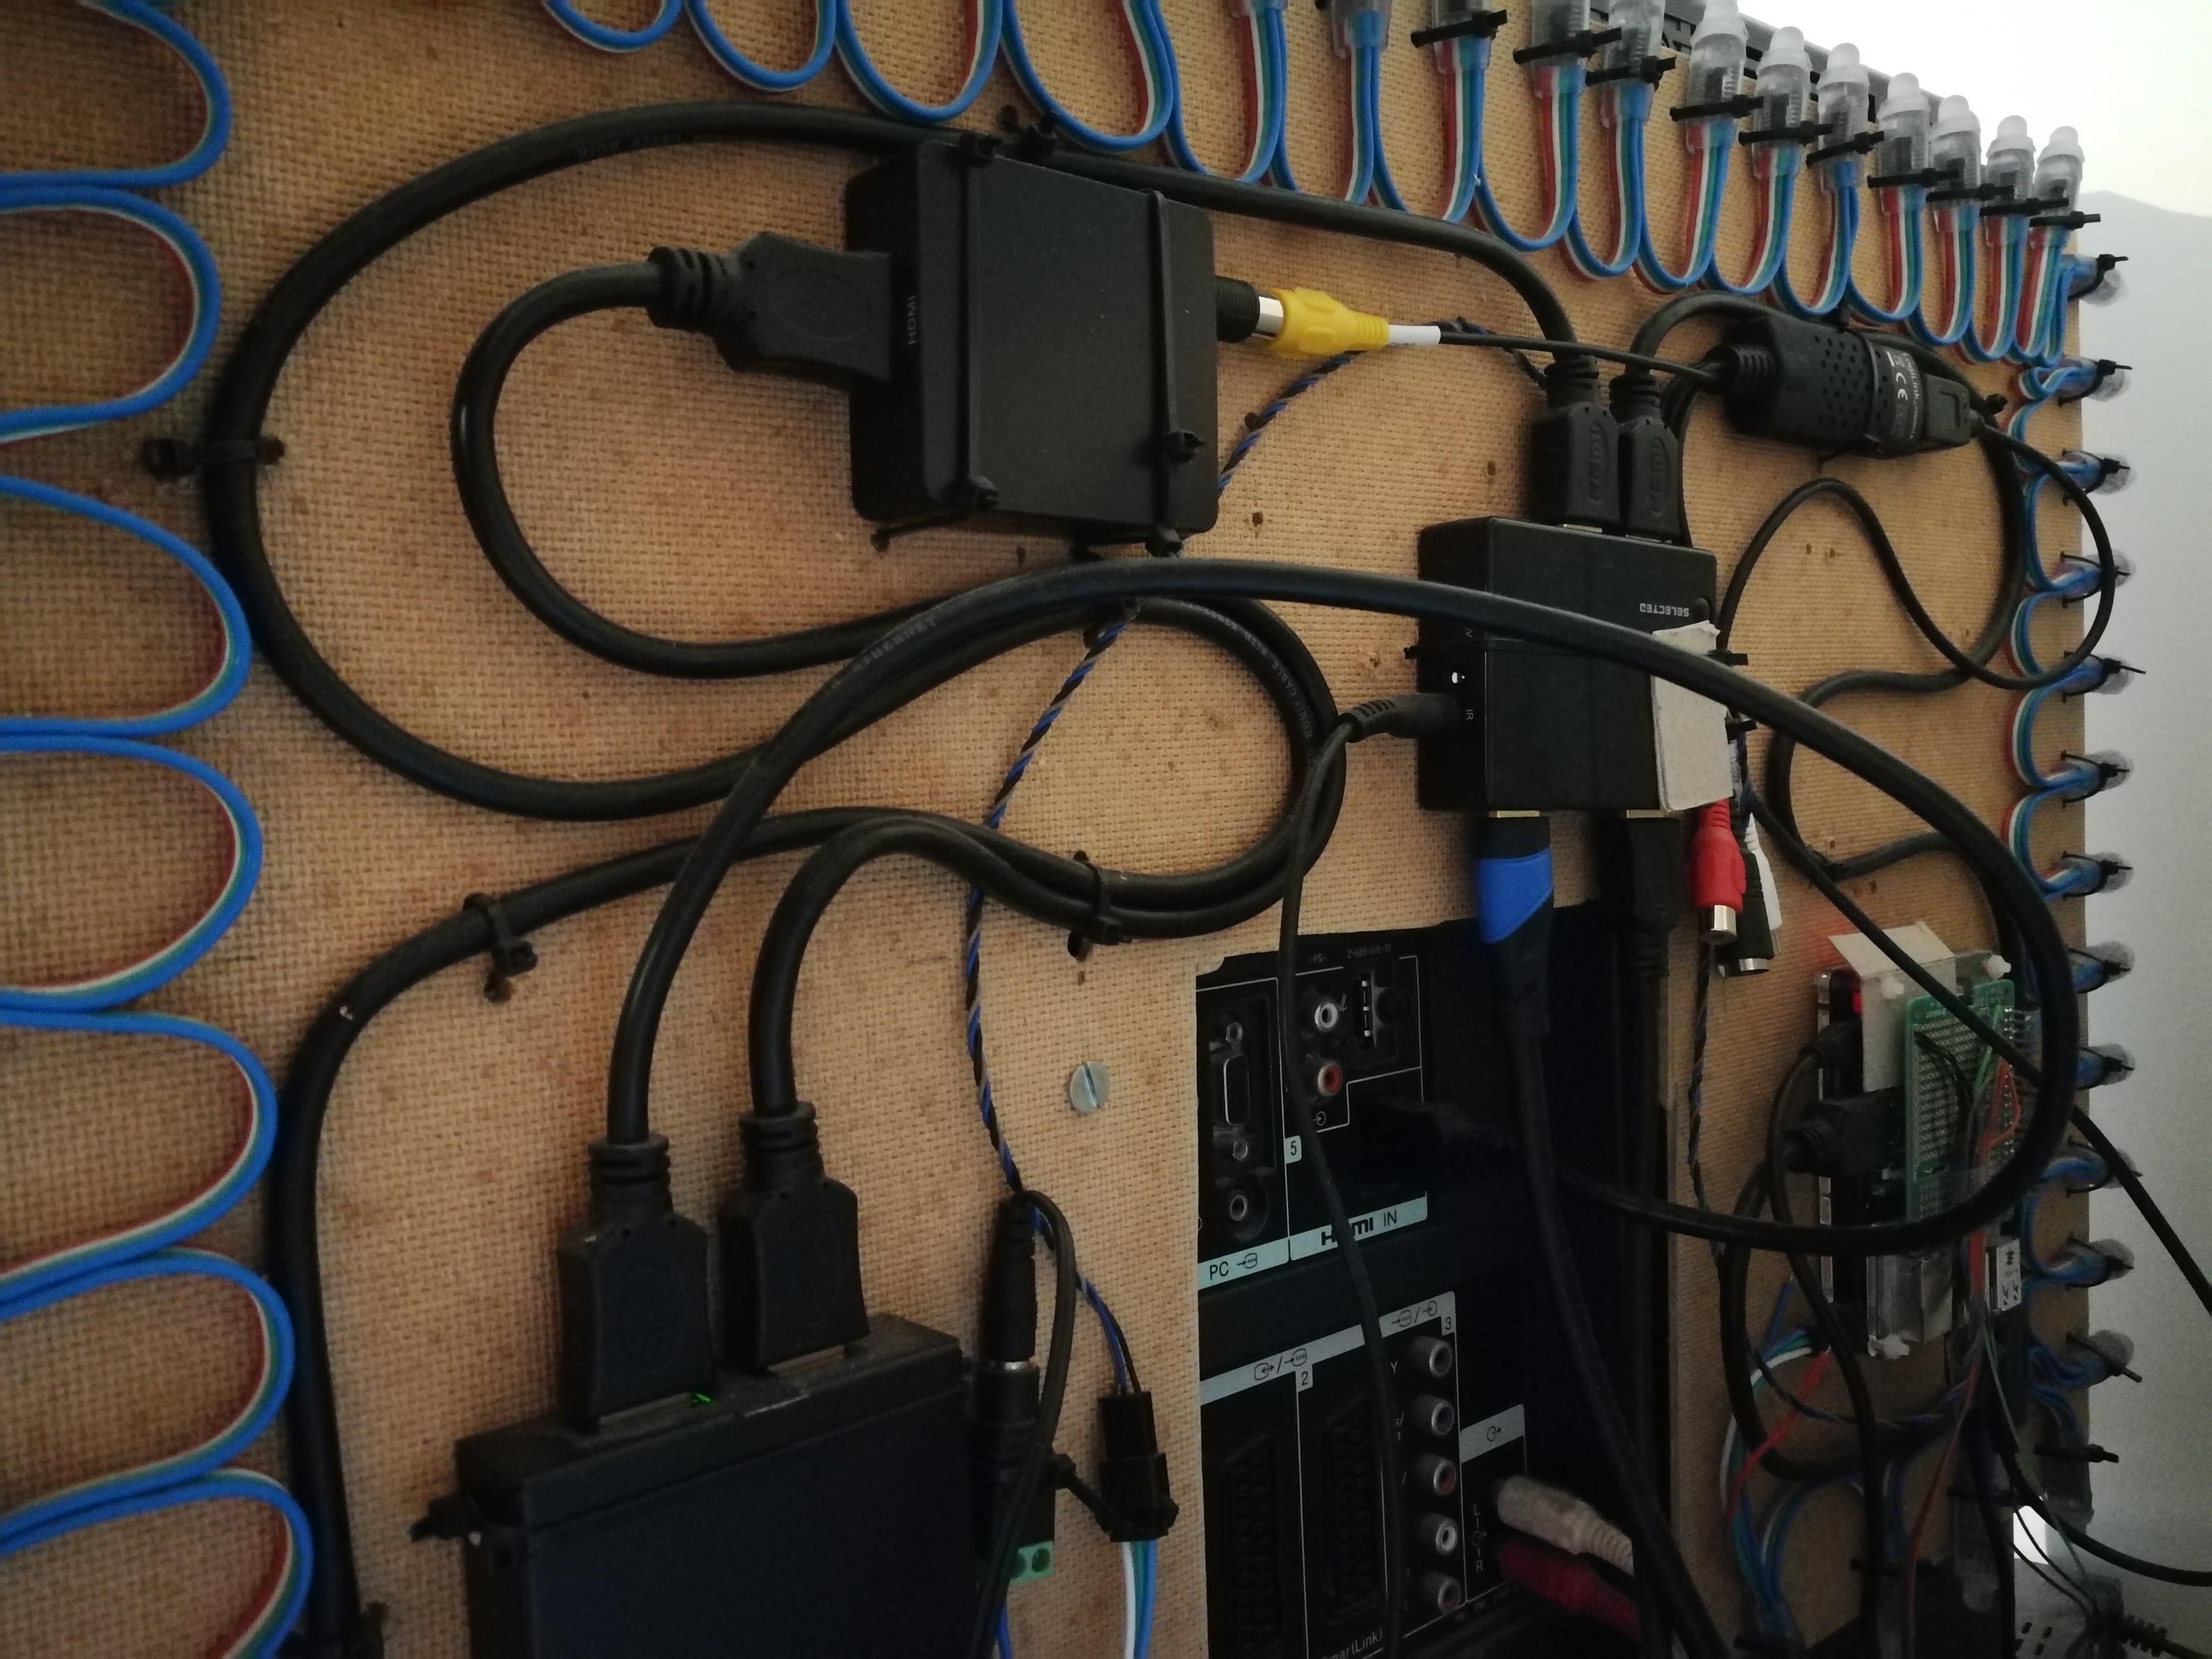
To simplify the HDMI capturing I removed the HDMI Splitter, HDMI2AV Converter and the USB-Videograbber and replaced it with a HDMI to USB 3.0 Video Capture Card with HDMI Loop Output.
Raspberry Pi with OSMC and Ambilight
To simplify the HDMI capturing I removed the HDMI Splitter, HDMI2AV Converter and the USB-Videograbber and replaced it with a HDMI to USB 3.0 Video Capture Card with HDMI Loop Output.
Since my ambilight installation is only usable for videos which are played directly from the Raspberry Pi I decided to upgrade the installation to support all HDMI sources.
Therefore I followed a german tutorial which can be found here: http://powerpi.de/ambilight-fuer-jedes-hdmi-geraet-die-ultimative-schritt-fuer-schritt-anleitung/
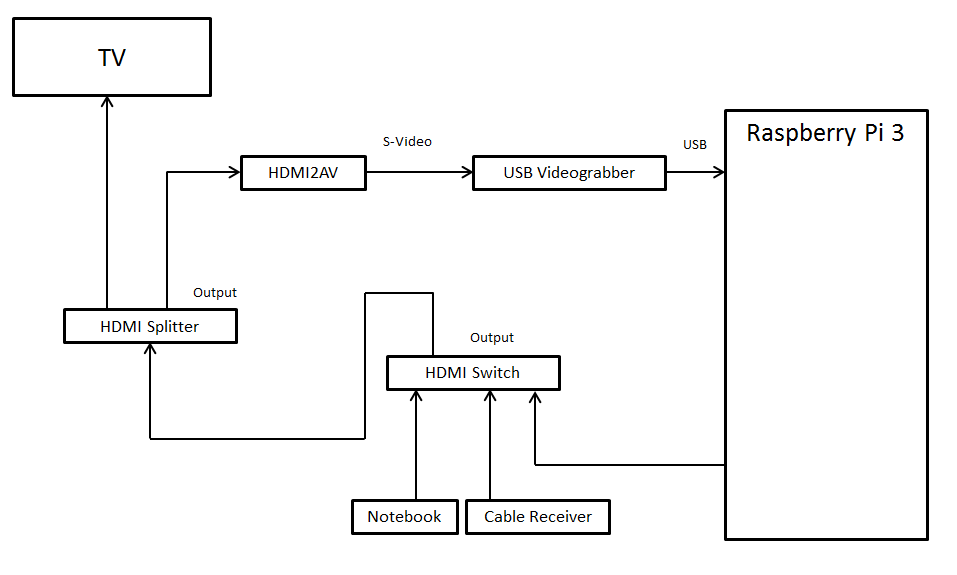
Since Raspbmc is no longer under development I upgraded to the enhancement called OSMC.
After installing OSMC on my SD card I tried to enable the device tree overlay for the GPIO IR Remote. This can be accomplished in the OSMC Settings Plugin or in the file /boot/config.txt by adding:
dtoverlay=lirc-rpi:gpio_out_pin=17,gpio_in_pin=18
Furthermore you need to delete the lircd.conf in /etc/lirc and store your version created for the remote at /home/osmc/lircd.conf. It is important to edit the “name” entry.
To enable the key functionality you need to add a Lircmap.xml to map the keys.
More information can be found in the entry on the OSMC forum: https://discourse.osmc.tv/t/rpi2-osmc-alpha-4-and-ir-gpio/483/12
You will need to configure a Lircmap.xml file and place it in /home/osmc/.kodi/userdata folder.
If there is none avaialable there, take the default one from here
/usr/share/xbmc/system/
and modify it.
Keep only one entry and make sure that the LIRC button names are correct (keep onet hat has KEY_LEFT, KEY_RIGHT, etc. in it).
Make sure you use the same name for the remote device name with the one configured in /etc/lirc/lircd.conf (if it’s generated, the name is the path where it was created. Feel free to rename it to something more handy, like ‘myremote’)
More info here:
http://kodi.wiki/view/Userdata/lircmap.xml27
Place the edited Lircmap.xml file in the /home/osmc/.kodi/userdata/Lircmap.xml and then restart kodi (or the RPi).
To enable the ambilight functionality I replaced Boblight with the lightweight Hyperion. The installation and configuration process is described in the wiki: https://github.com/tvdzwan/hyperion/wiki/Installation and https://github.com/tvdzwan/hyperion/wiki/Configuration.
Unfortunately the LEDs weren’t working in my setup. To debug the hyperion process you can start it with
sudo /usr/bin/hyperiond /etc/hyperion.config.json
While debugging I found a XBMC Connection Error (0) which is described in the forum: https://discourse.osmc.tv/t/rpi2-hyperion-osmc/449/43
The solution is to create a init script in /etc/systemd/system/multi-user.target.wants/hyperion.service
[Unit]
Description = hyperion
After = mediacenter.service

[Service]
User = osmc
Group = osmc
Type = simple
ExecStart= /usr/bin/hyperiond /etc/hyperion.config.json
Restart = always
RestartSec = 1

[Install]
WantedBy = multi-user.target
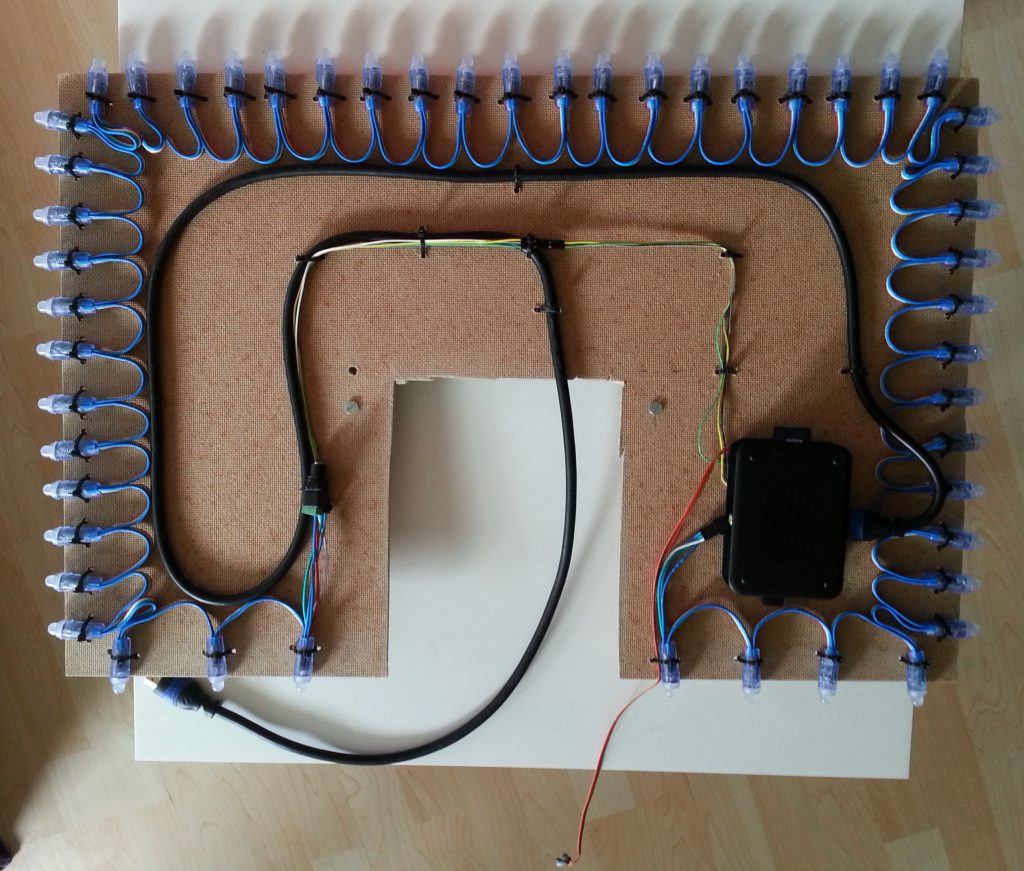
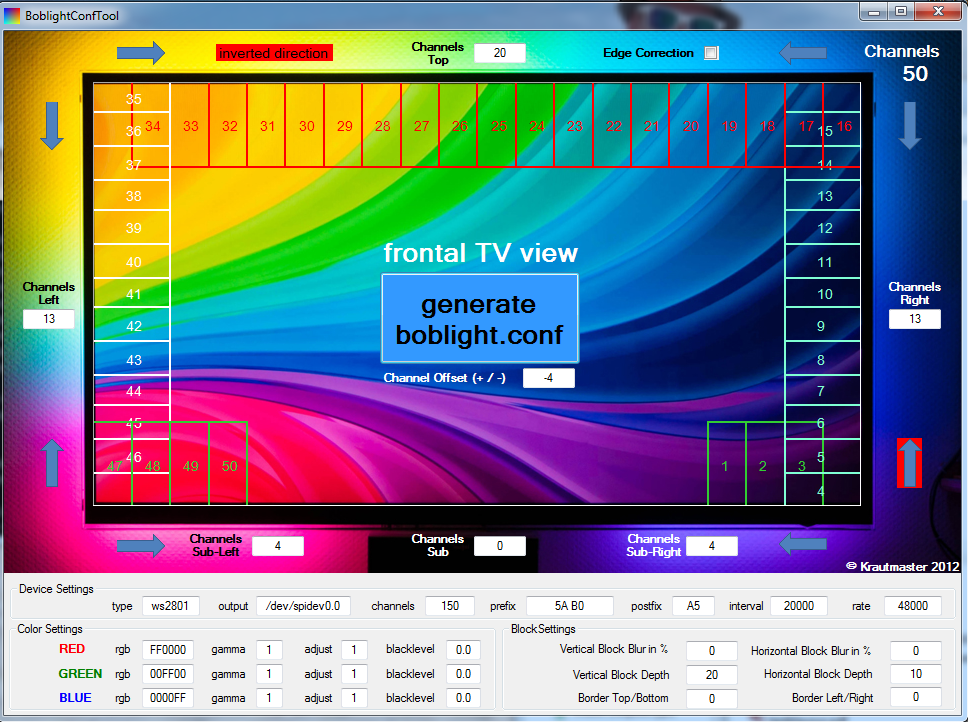
My second Raspberry Pi is connected to my TV running Raspbmc to play video files. I liked the idea of a custom ambilight installation described by _nadnerb so I bought some WS2801 LEDs and installed Boblight. The LEDs are connected by SPI to the raspberry. Boblight is then able to control the LEDs based on the output.
You can see the mounted LEDs and the Boblight config in the following images: